Index.
- Introduction.
- Boot the installed CD.
- Partition the harddisks.
- Create the RAID partitions.
- Install Slackware.
- First boot and settings.
- RAID and a failed disk.
- Harddisk SMART monitoring.
03-Jun-2011: Initial release.
30-Sep-2012: Fixed internal link.
04-Aug-2012: Updated for the Arch 2012 installer.
02-Jan-2013: Rewrote for Slackware 14.0
Introduction.
This article shows a way to install Slackware Linux on our server with software RAID (Redundant Array of Independent Disks). We will use RAID level 1, mirroring. RAID 1 is the only RAID level that can be used on the boot partition, because bootloaders (which read the boot partition) do not understand RAID, but a RAID 1 partition can be read like a normal partition. RAID 1 doesn’t protect your data, it will only protect you against a failing hard disk. It is assumed that you have some experience installing Slackware Linux.
This article is written using a Slackware distribution, but the procedure can be used on several other Linux distributions, specially the distributions that allow manual installation.
In this article the hard disks are 640 GB each, a normal size in the year that I created this server. There will be three partitions, one 25 GB partition for the operating system, one swap and one large partition for data storage. The partition layout will look like this:
- /dev/sda1 + /dev/sdb1 = /dev/md1 (25 GB active OS root).
- /dev/sda2 + /dev/sdb2 = 2 swap partitions, about 4 GB each.
- /dev/sda3 + /dev/sdb3 = /dev/md3 (LVM space for data partitions).
The steps to do the installation are:
- Boot the installer CD.
- Partition the hard disks.
- Create the RAID partitions.
- Install and configure Slackware.
- Install Grub on both hard disks.
- Finish install and reboot.
Boot the Installer CD.
Slackware-installer-14
Boot the Slackware Installer CD. After selecting the keyboard you will see the login prompt after a while. Login as root without a password.
Partition the hard disks.
Use fdisk to partition the first hard disk.
root@slackware:/# fdisk /dev/sda
Welcome to fdisk (util-linux 2.21.2).

Changes will remain in memory only, until you decide to write them.
Be careful before using the write command.

Device does not contain a recognized partition table
Building a new DOS disklabel with disk identifier 0x85ea19a0.

Command (m for help): n
Partition type:
   p   primary (0 primary, 0 extended, 4 free)
   e   extended
Select (default p): p
Partition number (1-4, default 1): 1
First sector (2048-1342177279, default 2048):
Using default value 2048
Last sector, +sectors or +size(K,M,G) (2048-1342177279, default 1342177279): +25
G
Partition 1 of type Linux and of size 25 GiB is set

Command (m for help): n
Partition type:
   p   primary (1 primary, 0 extended, 3 free)
   e   extended
Select (default p): p
Partition number (1-4, default 2): 2
First sector (52430848-1342177279, default 52430848):
Using default value 52430848
Last sector, +sectors or +size(K,M,G) (52430848-1342177279, default 1342177279):
 +4G
Partition 2 of type Linux and of size 4 GiB is set

Command (m for help): n
Partition type:
   p   primary (2 primary, 0 extended, 2 free)
   e   extended
Select (default p): p
Partition number (1-4, default 3): 3
First sector (60819456-1342177279, default 60819456):
Using default value 60819456
Last sector, +sectors or +size(K,M,G) (60819456-1342177279, default 1342177279):
 +610G
Partition 3 of type Linux and of size 610 GiB is set

Command (m for help): t
Partition (1-4): 1
Hex code (type L to list codes): fd
Changed system type of partition 1 to fd (Linux raid autodetect)

Command (m for help): t
Partition (1-4): 2
Hex code (type L to list codes): 82
Changed system type of partition 2 to 82 (Linux swap / Solaris)

Command (m for help): t
Partition (1-4): 3
Hex code (type L to list codes): fd
Changed system type of partition 3 to fd (Linux raid autodetect)

Command (m for help): a
Partition (1-4): 1

Command (m for help): p

Disk /dev/sda: 687.2 GB, 687194767360 bytes
255 heads, 63 sectors/track, 83546 cylinders
Units = sectors of 1 * 512 = 512 bytes
Sector size (logical/physical): 512 bytes / 512 bytes
I/O size (minimum/optimal): 512 bytes / 512 bytes
Disk identifier: 0x85ea19a0

   Device Boot      Start         End      Blocks   Id  System
/dev/sda1   *        2048    52430847    26214400   fd  Linux raid autodetect
/dev/sda2        52430848    60819455     4194304   92  Linux swap
/dev/sda3        60819456  1340082175   639631360   fd  Linux raid autodetect

Command (m for help): w
The partition table has been altered!

Calling ioctl() to re-read partition table.
Syncing disks.
root@slackware:/#
Note that I didn’t use the disk up to the last sector. If you ever need a replacement it is possible that the new drive doesn’t have the exact same amount of sectors. But, most likely you end up buying a larger replacement disk. We have now created two raid partitions and one swap partition and made the first partition active. Copy this partition table to the second disk:
root@slackware:/# sfdisk -d /dev/sda | sfdisk -q /dev/sdb
A whole lot of messages will follow, but in the end it should tell you that all went well. If not, start over again.
Create the RAID partitions.
First we need to load the RAID modules, then we can create the RAID arrays. We must set the metadata for the array to version 0.90. The newer versions like 1.0, 1.1 and 1.2 are not supported by most boot loaders, so you can only use 0.90.
root@slackware:/# modprobe raid1
root@slackware:/# mdadm -C /dev/md1 -l 1 --raid-devices 2 --metadata=0.90 \
                  /dev/sd[ab]1
mdadm: array /dev/md1 started.
root@slackware:/# mdadm -C /dev/md3 -l 1 --raid-devices 2 --metadata=0.90 \
                  /dev/sd[ab]3
mdadm: array /dev/md3 started.
root@slackware:/#
The swap partitions are not in a RAID array because there is no point in putting swap memory on RAID. Instead we will use two swap partitions in our server so that the swap will be balanced over the two disks. The next step is to prepare the swap partitions and start setup.
root@slackware:/# mkswap -L SwapA /dev/sda2
Setting up swapspace version 1, size = 4194300 KiB
LABEL=SwapA, UID=c36b79d3-b5db-41fe-a816-c500b342d224
root@slackware:/# mkswap -L SwapB /dev/sdb2
Setting up swapspace version 1, size = 4194300 KiB
Label=SwapB, UID=a174fe5a-dd31-4001-a979-338970a7f796
root@slackware:/# swapon /dev/sda2 /dev/sdb2
root@slackware:/# setup
Install Slackware.
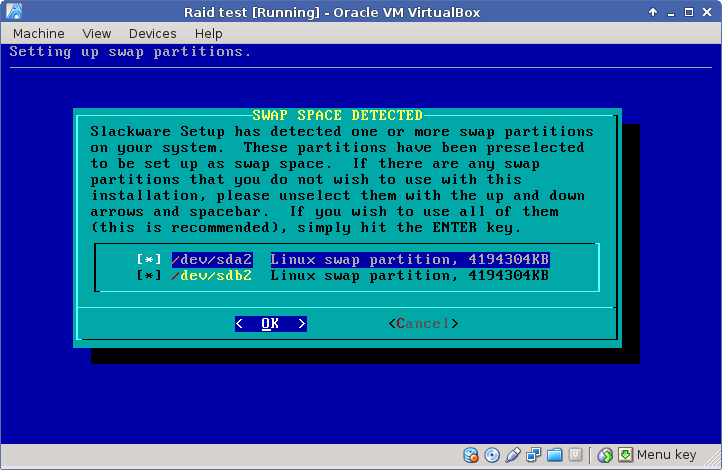
Swap setup
In setup, when you come to the setup of the swap partitions, you will see that the prepared partitions are detected. Answer all next questions and the two partitions will be added to the /etc/fstab file.
Next select /dev/md1 for your Linux partition, select the ext4 filesystem (may be the best choice in this setup). When done, don’t select the other (/dev/md3) partition, we will do that after the system is installed.
Then continue the installation, for the server you only need packages from the A, AP, D, L and N series. You can deselect some packages you really don’t need. At least I would install the complete L series. In the A series, deselect lilo, we will use syslinux to boot the system.
When the package installation is complete, and you have done the menus to configure the new system, don’t reboot yet because there is no boot loader. We will install syslinux by hand. It is easier then lilo, you only need to do this once. There are also some nice tools to put in the boot menu. First step is to install the MBR boot records on both drives and then to install syslinux on the raid array.
root@slackware:/# dd bs=440 count=1 if=/mnt/usr/share/syslinux/mbr.bin of=/dev/s
da
1+0 records in
1+0 records out
440 bytes (440B) copied, 0.048536 seconds, 8.9KB/s
root@slackware:/# dd bs=440 count=1 if=/mnt/usr/share/syslinux/mbr.bin of=/dev/s
db
1+0 records in
1+0 records out
440 bytes (440B) copied, 0.048536 seconds, 8.9KB/s
root@slackware:/# cd /mnt
root@slackware:/mnt# chroot . /bin/bash
root@slackware:/# mkdir /boot/syslinux
root@slackware:/# cd /boot/syslinux
root@slackware:/boot/syslinux# ln -s /usr/share/syslinux/chain.c32
root@slackware:/boot/syslinux# ln -s /usr/share/syslinux/hdt.c32
root@slackware:/boot/syslinux# ln -s /usr/share/syslinux/menu.c32
root@slackware:/boot/syslinux# ln -s /usr/share/syslinux/reboot.c32
root@slackware:/boot/syslinux# ln -s /usr/share/syslinux/vesamenu.c32
root@slackware:/boot/syslinux# ln -s /usr/share/syslinux/poweroff.com
root@slackware:/boot/syslinux# ln -s /usr/share/hwdata/pci.ids
root@slackware:/boot/syslinux# extlinux --install /boot/syslinux -r
/boot/syslinux is device /dev/md1
root@slackware:/boot/syslinux# vi syslinux.cfg
Now create a minimal syslinux.cfg file, later we will expand this file.
DEFAULT huge
PROMPT 0
TIMEOUT 100
UI menu.c32

LABEL huge
        MENU LABEL Slackware Huge Kernel
        LINUX ../vmlinuz
        APPEND vt.default_utf8=0 root=/dev/md1 ro

LABEL hdt
        MENU LABEL Hardware Detection Tool
        COM32 hdt.c32

LABEL off
        MENU LABEL Power Off
        COMBOOT poweroff.com
Now exit the chroot environment and reboot.
root@slackware:/boot/syslinux# exit
root@slackware:/# umount /mnt
root@slackware:/# reboot
root@slackware:/#
That should be the complete base installation. Congrats if your system boots, you didn’t miss a step. You will see some errors about missing volume groups, but that is correct, we haven’t created these yet,
First boot and settings.
Now that the basic system is installed some changes need to be made to finish the RAID installation. Create /etc/mdadm.conf and fill it with the data of your running arrays. Then with your favorite editor append the email address where to send RAID alarm messages to.
root@homsrv:~# mdadm --examine --scan > /etc/mdadm.conf
root@homsrv:~# vi /etc/mdadm.conf
Append these two lines:
MAILADDR root@wpl.uk
PROGRAM /etc/mdadm-event-handler.sh
You won’t get any mail yet because there is no mailer installed right now, that’s a different story. Besides that, you also need the mdadm-event-handler.sh script which will send the mail. This script is available in the download example archive. Add the following line to /etc/rc.d/rc.local to start the monitor at boot:
[ -x /sbin/mdadm ] && /sbin/mdadm --monitor --scan -i /var/run/mdadm.pid -f
If at this point you still see a lot of disk activity, don’t worry, most likely the RAID arrays are still being build. You can check that with:
root@homsrv:~# cat /proc/mdstat
Personalities : [raid1]
md3 : active raid1 sda3[0] sdb3[1]
 639500096 blocks super 1.2 [2/2] [UU]
 [========>............]  resync = 44.2% (286779456/639500096) finish=149.2min \
          speed=63997K/sec

md1 : active raid1 sda1[0] sdb1[1]
 26197888 blocks super 1.2 [2/2] [UU]

unused devices: <none>
root@homsrv:~#
It is safe to continue the installation on the md3 array, it will get in sync sometime.
RAID and a failed disk.
Here is the status of the system when disk 1 is dead, in other words /dev/sda is missing. Do take note that /dev/sdb now shows as /dev/sda but the underscore on the blocks line should give you a hint that it’s the first drive that is gone.
root@homsrv:~# cat /proc/mdstat
Personalities : [raid1]
md3 : active raid1 sda3[1]
      639500096 blocks super 1.2 [2/1] [_U]

md1 : active raid1 sda1[2]
      26197888 blocks super 1.2 [2/1] [_U]

unused devices: <none>
root@homsrv:~#
Now, get a new drive and place it in your server. But first move the old second disk to the place of the first disk or we will have boot failures. If you put the new drive at the first position the systems BIOS will be confused because there is no MBR on the new disk. In our example, we couldn’t get a 640 GB drive, but we got a 900 GB drive instead. With the old surviving drive as first drive, the new one as second drive, turn the system on and it should boot without problems. The next thing we should do is rebuild the RAID arrays on the new drive. We start by copying the partition tables.
root@homsrv:~# sfdisk -d /dev/sda | sfdisk -q /dev/sdb

Disk /dev/sdb: 117487 cylinders, 255 heads, 63 sectors/track

sfdisk: ERROR: sector 0 does not have an msdos signature
sfdisk:  /dev/sdb: unrecognized partition table type

Old situation:
sfdisk: No partitions found

New situation:
Units = sectors of 512 bytes, counting from 0

   Device Boot    Start       End   #sectors  Id  System
/dev/sdb1   *      2048  52430847   52428800  fd  Linux raid autodetect
/dev/sdb2      52430848  60819455    8388608  82  Linux swap / Solaris
/dev/sdb3      60819456 1340082175 1279262720  fd  Linux raid autodetect
/dev/sdb4             0         -          0   0  Empty
Successfully wrote the new partition table

Re-reading the partition table ...

root@homsrv:~#
Now rebuild the raid arrays.
root@homsrv:~# mdadm /dev/md1 -a /dev/sdb1
mdadm: added /dev/sdb1
root@homsrv:~# mdadm /dev/md3 -a /dev/sdb3
mdadm: added /dev/sdb3
root@homsrv:~# cat /proc/mdstat
Personalities : [raid1]
md3 : active raid1 sdb3[2] sda3[1]
      639500096 blocks super 1.2 [2/1] [_U]
        resync=DELAYED

md1 : active raid1 sdb1[3] sda1[2]
      26197888 blocks super 1.2 [2/1] [_U]
      [>....................]  recovery =  3.3% (878464/26197888) finish=18.5min
 speed=22786K/sec

unused devices: <none>
root@homsrv:~#
Bringing your new drive up to date will take hours to complete.
About swap, your system booted with a swap error because the new drive didn’t have partitions when powered on. You only have swap from the first (old) disk with label SwapB. This one should be renamed to SwapA and on the new drive we will create SwapB. Issue the following commands to reinstall your swap:
root@homsrv:~# swapoff -a
root@homsrv:~# mkswap -L SwapA /dev/sda2
Setting up swapspace version 1, size = 4194300 KiB
LABEL=SwapA, UUID=0918ad72-ab8d-4a09-a7a0-65aaeeb91b85
root@homsrv:~# mkswap -L SwapB /dev/sdb2
Setting up swapspace version 1, size = 4194300 KiB
LABEL=SwapB, UUID=3c147668-0eec-4643-8628-d6c4c1c820e6
root@homsrv:~# swapon -a
root@homsrv:~#
Now wait until the disks are in sync again. In the meantime you should reinstall syslinux on the new disk, but only after /dev/md1 is up to date!
root@homsrv:~# extlinux --install /boot/syslinux -r
/boot/syslinux is device /dev/md1
root@homsrv:~#
Harddisk SMART monitoring.
Make sure that the package smartmontools is installed. Then edit /etc/smartd.conf and place a # character before the uncommented DEVICESCAN. Then add two lines like this (assuming you have SATA drives):
/dev/sda -a -d sat -I 194 -W 4,52,57 -R 5 -m admin@wpl.uk
/dev/sdb -a -d sat -I 194 -W 4,52,57 -R 5 -m admin@wpl.uk
In /etc/rc.d/rc.M the lines to start smartd are commented out, you need to remove these comments so that smartd will start at system boot. Again, you cannot receive any mail yet because there is no mailserver at this stage.