Index.
- Introduction.
- Overview.
- Bridge configuration.
- OpenVPN server certificate.
- OpenVPN server configuration.
- Download.
08-Jul-2011: initial release.
06-Jan-2013: updated for Slackware.
07-Aug-2013: changed to allow another server.
01-Sep-2013: using XCA to create a certificate.
18-Apr-2015: adapted for new firewall scripts.
Introduction.
If we want to access our Home Server network from a remote location we need a secure solution. Ideally the connection should look like if we are directly plugged into our network. We can do this using OpenVPN in bridged mode. On both sides we use tap adapters so the connection will be a true network bridge. A connected client then looks like if it’s plugged into the network with a cable, this makes sure that both IPv4 and IPv6 work. Even protocols like IPX can be used.
There is also a routed vpn possible. Some clients can only use that such as standard android devices. Article coming…
To secure the connection certificates are used on the server side and for each client. Use always one client certificate for each remote device (laptop, tablet, smartphone). If such device gets lost (stolen) you can simply revoke that certificate to prevent access to your network.
Overview.

Homeserver network design
On the server OpenVPN listens on UDP port 1194. In the firewall you need to open this port and forward it to the server which runs OpenVPN, in our example setup, gateway must forward this to the home server.
In this drawing we see the interface for OpenVPN as br0/lan0/tap0. This is a bridged network interface, allmost all programs on the server need to refer to br0 instead of lan0. Now lan0 is only the physical interface, and tap0 is the virtual OpenVPN interface.
After setting this all up, you must update all applications that refer to lan0 and change it into br0.
To allow client access, add a FQDN to the DNS for our OpenVPN service like vpn.wpl.uk. This name will also be used in the certificates.
Bridge configuration.
First, install the bridge-utils and openvpn packages. Then edit /etc/rc.d/rc.inet1-pre and add the next two lines in the start function:
/sbin/modprobe tun
/sbin/ip tuntap add dev tap0 mode tap
Next, edit /etc/rc.d/rc.inet1.conf so that the lan network interface becomes a bridged interface using the lan0 interface and tap0 interface. Make sure to use the modified network-scrips-ipv6 package from this server. The settings look like this:
# Config information for eth0:
IFNAME[0]="br0"
BRNICS[0]="lan0 tap0"
BRIDGE_FORWARDDELAY[0]="0"
IPADDR[0]="10.126.160.253"
...
In the firewall you must now also change the lan0 network interface into br0. Rename the lan0-*.conf scripts in the /etc/mbse-fireall/conf.d directory into br0-*.conf. Also important, set FW_NO_BRIDGE_NF_CALL=”1″ in /etc/mbse-firewall/firewall.conf.
While you are working on the firewall, you might add the OpenVPN UDP port 1194 to the gateway and forward it to the Home Server.
Now there is one thing left, you must reconfigure all applications that reference lan0 in their configuration files. Use the following command from the /etc directory to find them:
root@homsrv:/etc# grep -R lan0 *
rc.d/rc.inet1.conf:BRNICS[0]="lan0 tap0"
rc.d/rc.inet1.conf:## Example config information for wlan0.  Uncomment the lines
 you need and fill
rc.d/rc.inet1.conf:#IFNAME[4]="wlan0"
rc.d/rc.inet1.conf:## Config information for wlan0:
rc.d/rc.inet1.conf:#IFNAME[4]="wlan0"              # Use a different interface n
ame instead of
rc.d/rc.inet1:*_restart) # Example: "wlan0_restart" will take 'wlan0' down and u
p again
udev/rules.d/70-persistent-net.rules:SUBSYSTEM=="net", ACTION=="add", DRIVERS=="
?*", ATTR{address}=="08:00:27:f1:4f:3a", ATTR{dev_id}=="0x0", ATTR{type}=="1", K
ERNEL=="eth*", NAME="lan0"
root@homsrv:/etc#
Before you continue, it may be a good idea to reboot the server to see if everything works as planned. You can check the bridge with:
root@homsrv:~# brctl show
bridge name     bridge id               STP enabled     interfaces
br0             8000.080027f14f3a       no              eth0
                                                        tap0
root@homsrv:~#
OpenVPN server certificate.

Create server certificate
For this article we will use the FQDN vpn.wpl.uk for our OpenVPN server. Using the same procedure as in the certificates article, create a server certificate for vpn.wpl.uk.
In the source screen, select the HTTPS_server template, use the wpl-uk-ca root certificate and press Apply all.

Generate key
Create a key for this server.

Subject tab
Set the fields for the server. Use the official name for our OpenVPN server like vpn.wpl.uk as commonName. You should also make sure that this name exists in the DNS because client computers will be using this name to connect to your OpenVPN server.
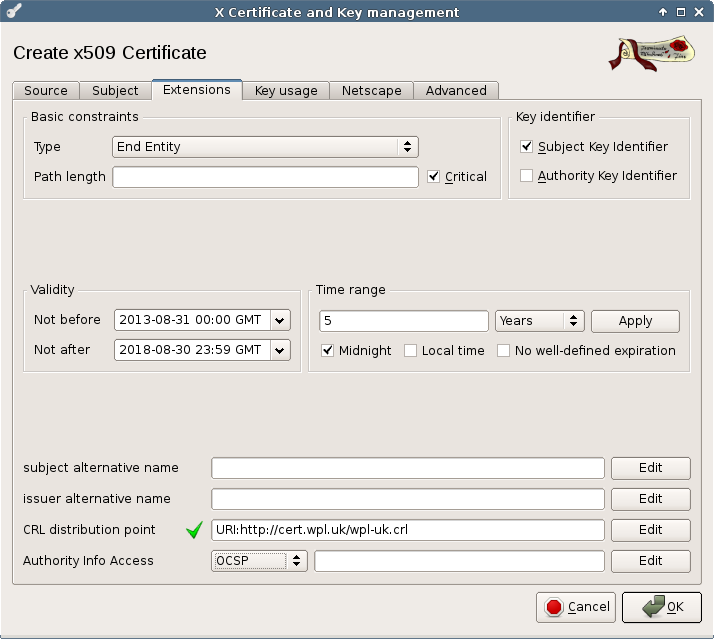
Extensions tab
In the extensions tab, set the lifetime and location for the CRL list. That last one is not really needed, because a copy will be made available on the local file system of the Home Server machine.
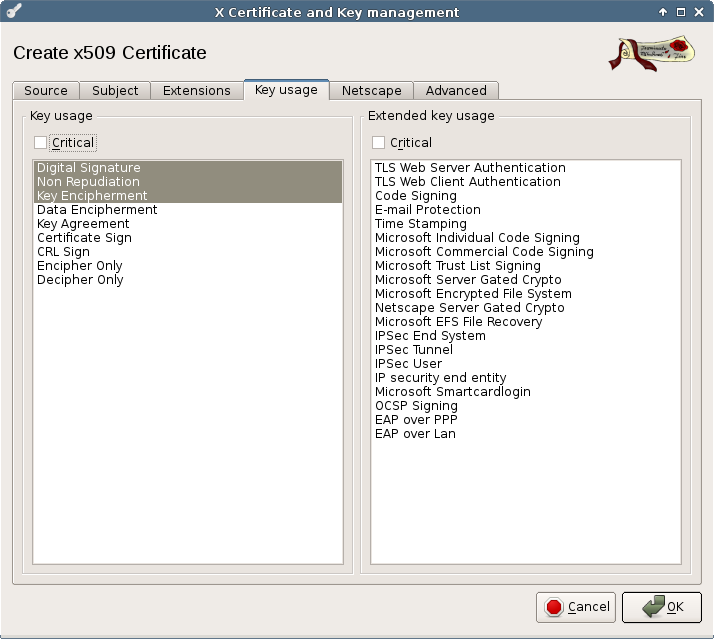
Key Usage tab
The values set by the template should be fine.

Netscape tab
The Netscape extensions should be fine too.
Now press Ok to create the certificate. Export the certificate and key and copy these to your home server in the /etc/certs directory.
On the Home Server set the right file protection:
root@homsrv:~# chmod 444 /etc/certs/wpl-vpn-srv.crt
root@homsrv:~# chmod 400 /etc/certs/wpl-vpn-srv.pem
root@homsrv:~#
OpenVPN server configuration.
To complete the OpenVPN server configuration two extra keys need to be created.
root@homsrv:~# cd /etc/certs
root@homsrv:/etc/certs# openssl dhparam -out dh 1024
Generating DH parameters, 1024 bit long safe prime, generator 2
This is going to take a long time
........................+....+................................+................
.................................................................+.............
...+....+.....................................................................+
.....................................................................+.....+...
................................+..............................................
.........................+.+...................................................
...............................................................................
...........+..+............+...................................................
..................................................+............................
..................+....+................................................+......
..........+........+...........................................................
..........................................................................+....
......+........................................................................
.........................+............................+........................
...............+..............................+.............................+..
...............................................................................
+......++*++*++*
root@homsrv:/etc/certs# mkdir -p /etc/openvpn/homsrv-tap /etc/openvpn/homsrv-tun
root@homsrv:/etc/certs# cd /etc/openvpn/homsrv-tap
root@homsrv:/etc/openvpn/homsrv-tap# openvpn --genkey --secret ta.key
root@homsrv:/etc/openvpn/homsrv-tap# cp ta.key ../homsrv-tun
root@homsrv:/etc/openvpn/homsrv-tap#
The file /etc/openvpn/homsrv-tap.conf:
cd /etc/openvpn/homsrv-tap
port 1194
proto udp
dev tap0

ca /etc/certs/wpl-uk-ca.crt
cert /etc/certs/wpl-vpn-srv.crt
key  /etc/certs/wpl-vpn-srv.pem
dh /etc/certs/dh

# server to configure the client.
#server-bridge (should work and translate to the next lines,
# but it doesn't work).
#server-bridge nogw
mode server
tls-server

client-to-client
keepalive 10 60
# The second parameter should be '0'
# on the server and '1' on the clients.
tls-auth ta.key 0 # This file is secret
cipher AES-128-CBC  # Best performance.
comp-lzo
passtos
max-clients 10
user nobody
group nobody
persist-key
persist-tun
status openvpn-status.log
verb 1
# Revoked certificates.
crl-verify /etc/certs/wpl-uk.crl
Now you can start the server:
root@homsrv:/etc/openvpn# /etc/rc.d/init.d/openvpn start
Starting openvpn connections: homsrv-tap
root@homsrv:/etc/openvpn#
In the next article you can see how to configure a Windows client.
Download.
See the download page for the script and configuration files.