Index.
Introduction.- Create the Root certificate.
- Certificate Revocation List.
- Create a server certificate.
- Remarks.
- Download.
28-Aug-2013: initial release.
01-Sep-2013: added CRL export.
Introduction.
A lot of server software needs certificate files to allow encrypted connections, think about mail TLS connections, https for safe web browsing etc. Large companies let these certificates sign or create by expensive companies so that they are valid in the usual chain of trusted certificates. For our Home Server this is too expensive and not needed. But we do need a complete chain to make our life a little bit easier. If we create a complete chain including a CA (Central Authority) root certificate, then we only need to install that root certificate once on all our computers on our network.
In the early days of these articles I used scripts to create the certificates. You can find the old article here. But now I started using XCA which is a CA management program that runs in X-Windows. This program uses a database to store all the certificates, keys and structure. This database has a password but isn’t encrypted, so for better protection, store this database on an external disk like a SD card or USB stick and keep it in a safe place. You can encrypt this external drive.
In this article, I will describe how to create the root certificate and one server certificate for the mail server. All other certificates will be described with the articles where they belong to. We will also publish a certificate revoke list (crl), and put it on a public website. That same site is a good place to publish the public part of the root certificate too so that it is easy to download and install on client computers.
Create the Root certificate.
Start XCA, create a new database and set a password on that database. Then we will create a root certificate and key. Because I choose to let the root certificate be valid for 20 years, you need a key of at least 2048 bits. Note that you can use a shorter lifetime for the root certificate, but be aware that you cannot refresh it when it expires. In that case you need to rebuild all certificates. So pick a very long lifetime, just like commercial root certificates. Below procedure to create the root certificate.
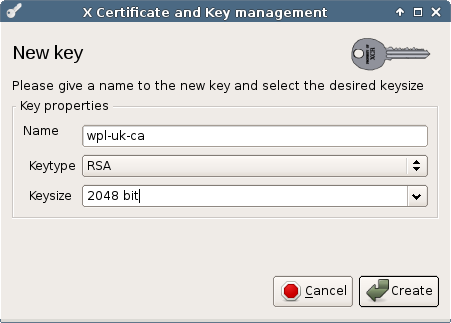
Create CA key
First create the 2048 bits RSA key and set the name we will use for this key/certificate.
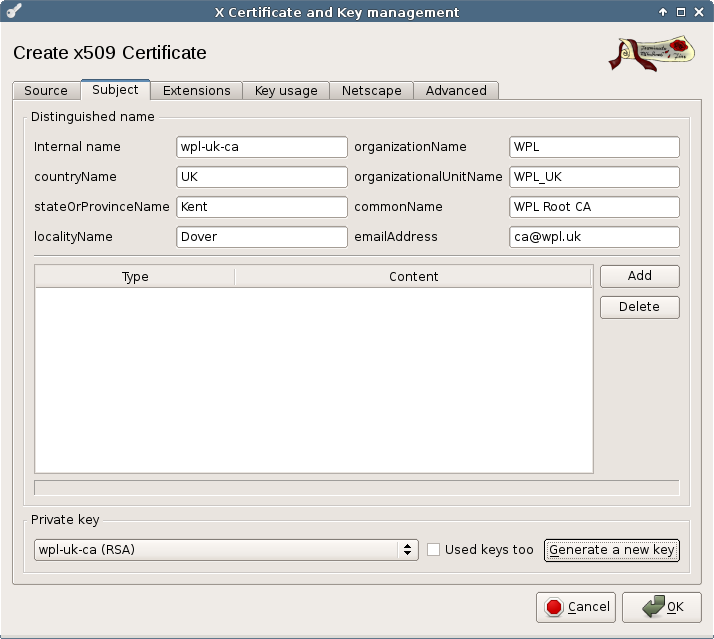
Create root CA, subject tab.
Next in the main menu select the certificates tab, and in the menu on the right select New certificate.
In the Source tab of the new screen, select Create a self signed certificate with serial 1, select the [default] CA template and press Apply all. Then select the Subject tab to fill in your details.
Set the internal name the same as the name of the generated key, set your 2 letter country code, location (optional), organization, organizational unit. Give it a common name like “Organization Root CA” and set a valid email address.
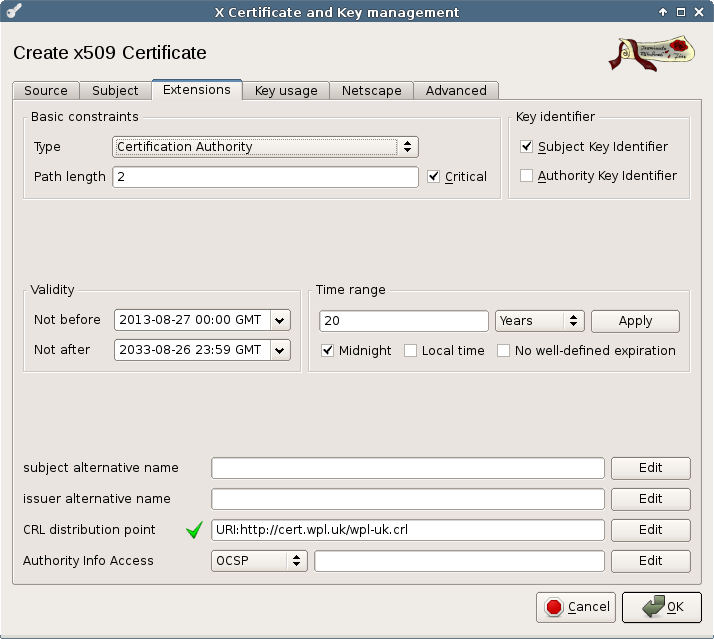
Create Root CA, extensions.
Next tab is the extensions. Set the type to Certification Authority. I set the Path length to 2. I don’t use it in this project, but if you need it in the future, you can have an extra certification authority level below the root CA.
Set the valid time range to 20 years. After you change this, press the Apply button to update the date fields.
Then fill in the CRL distribution point. Here we set the URL of the certificate revocation list. This list will be created at a later stage, but we must fill in the location before we create this certificate. Choose this well, you need it for the next 20 years and you cannot change it after this CA is created. Optionally, you can choose not to use a CRL list, in that case leave the URL empty.
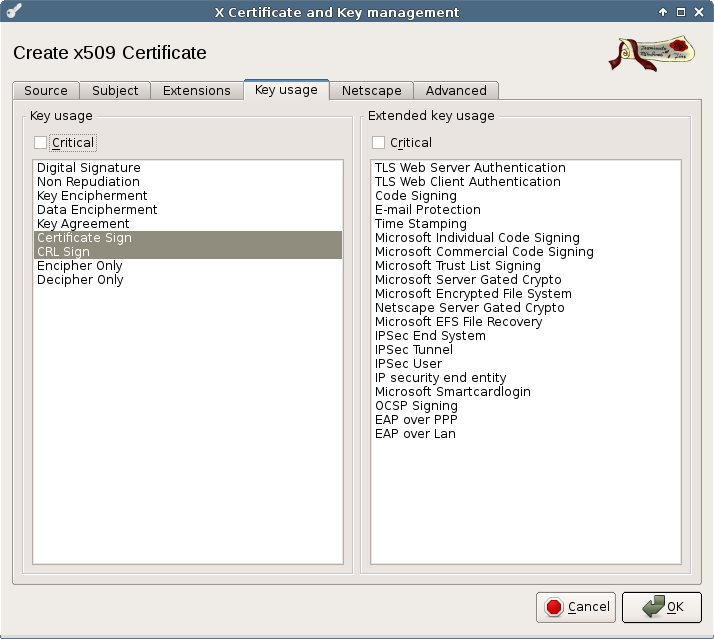
Create CA, Key usage.
The next tab is about Key usage. All selections should be correct if you used the [default] CA template.
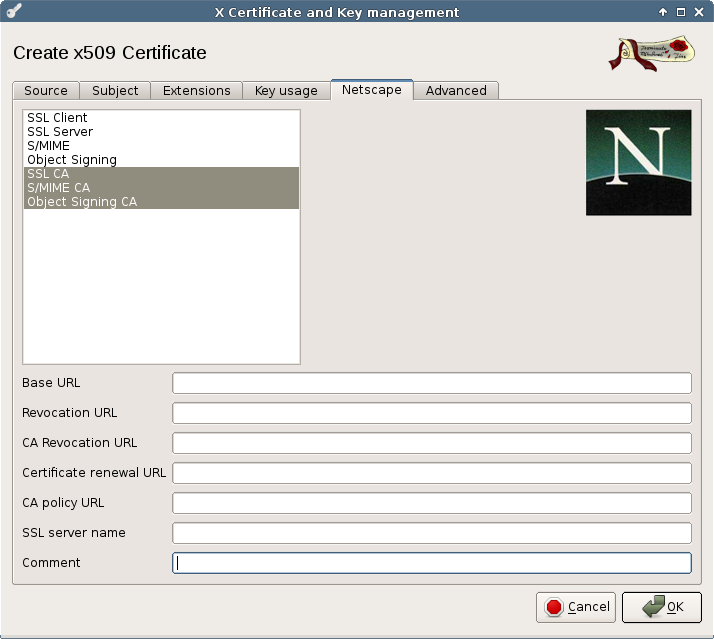
Create CA, Netscape.
Next tab are the Netscape extensions. This should be fine too, and these extensions are obsolete now.
Now you can press the Ok button to create the Root certificate.
Certificate Revocation List.
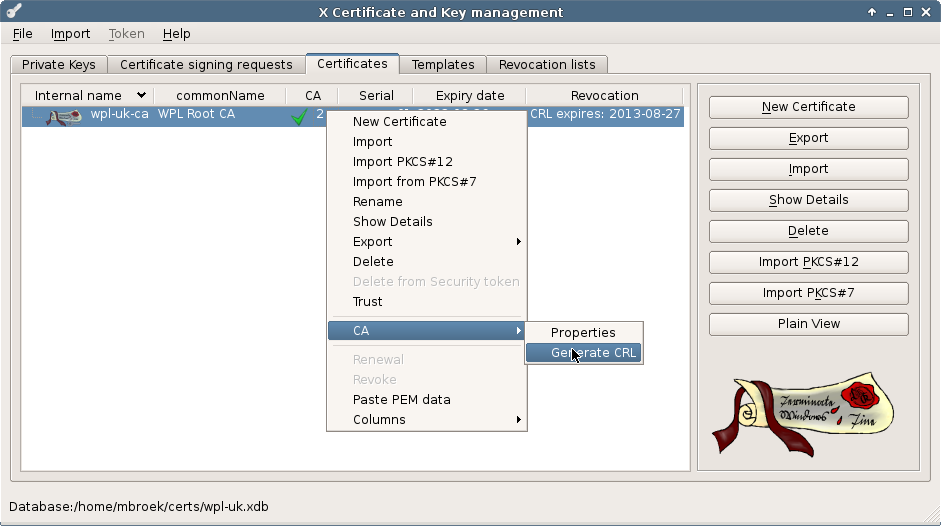
Create CRL.
Next we are going to create the Certificate Revocation List. Skip this if you didn’t select one with the creation of the Root CA. In the main menu Certificates tab, right click on the Root CA. Then select CA and Generate CRL.
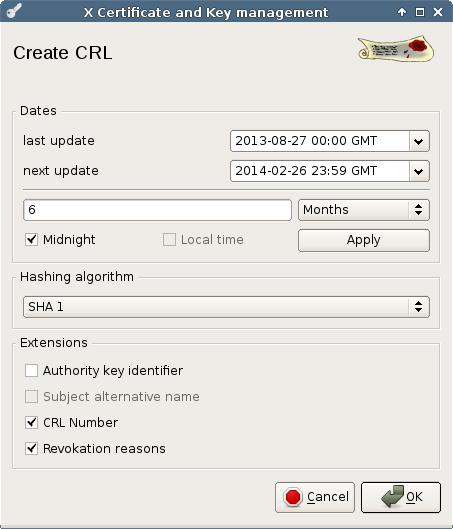
Generate CRL.
Select a period, default is one month but I use a longer period for a small network like this. If you need an update before this list is invalid, you can safely generate a updated list.
Right now there are not yet any revoked certificates, but a valid list will be produced that says there are no revoked certificates.
Leave the hashing algorithm at SHA1, newer algorithms cannot be used by old clients line Windows XP.
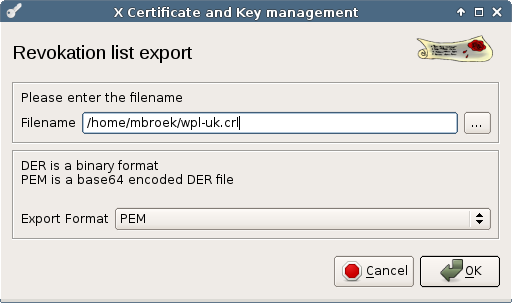
Export CRL
When we have created a CRL list, it can be exported to really make use of it. Give it a filename with .crl extension and save it.
The resulting file should be published on the location that is set in the CRL distribution point. Even if you don’t publish this file, programs like OpenVPN can make use of this list.
Create a server certificate.
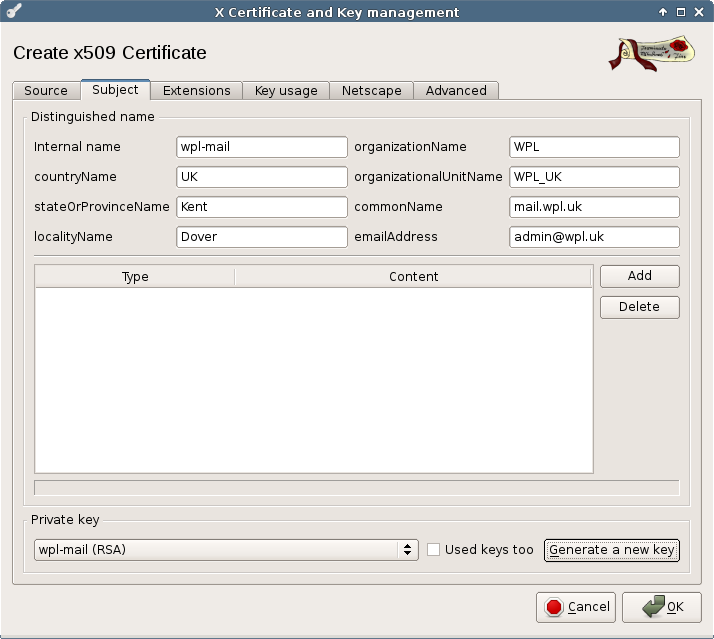
Now create the first certificate for the mail server with the external name mail.wpl.uk. This name will be used as commonName in the certificate and must match the official server name. If it’s different, clients will never trust the certificate. It can be convenient to create a new template based on the HTTPS server template where you already fill in some fields. Leave the commonName field empty in this template.
Create mail server certificate.
Create a new certificate using the menu. In the source screen select “Use this certificate for signing” and select your Root CA. Select the [default] HTTPS_server template or your own server template and press Apply all.
Select the Subject tab and complete this form. Set the internal name to something useful. I use a combination of the domain name and function of the certificate. Set the commonName to the real DNS name of the server.
Before you leave this tab, press the Generate a new key button. If you plan on a lifetime for this server less then 10 years, a 1024 bit key is long enough and just use the default values to create the key.
Mail certificate extensions.
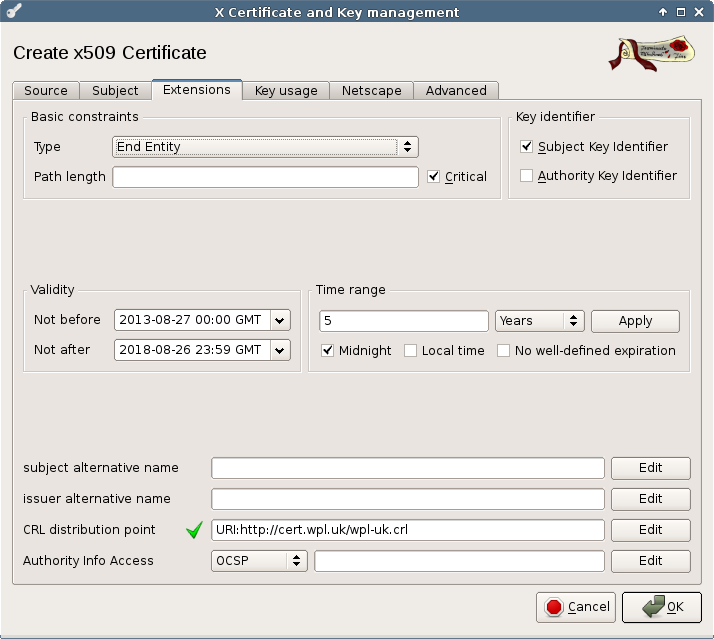
In the extensions tab, make sure the type is End Entity.
Set a Time range and press Apply.
If you use it, set the CRL distribution point the same as in the Root CA.
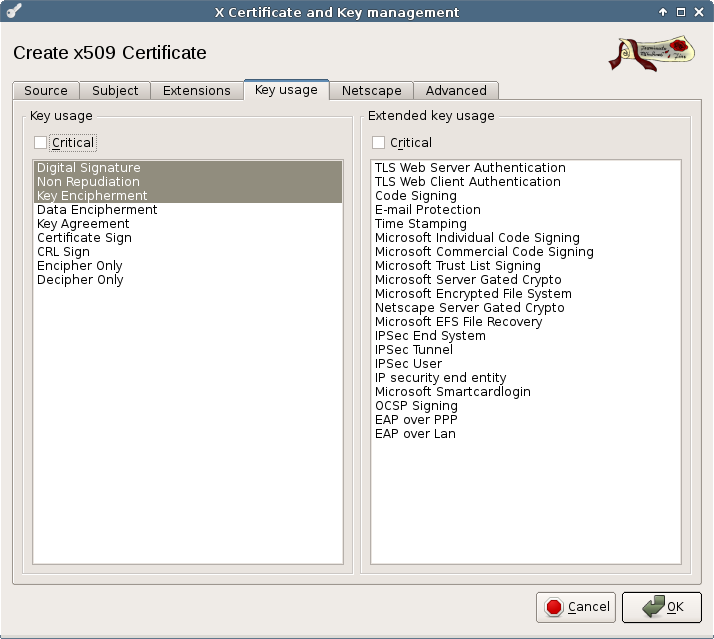
Mail certificate Key usage.
In the Key usage tab, you should not need to change anything.
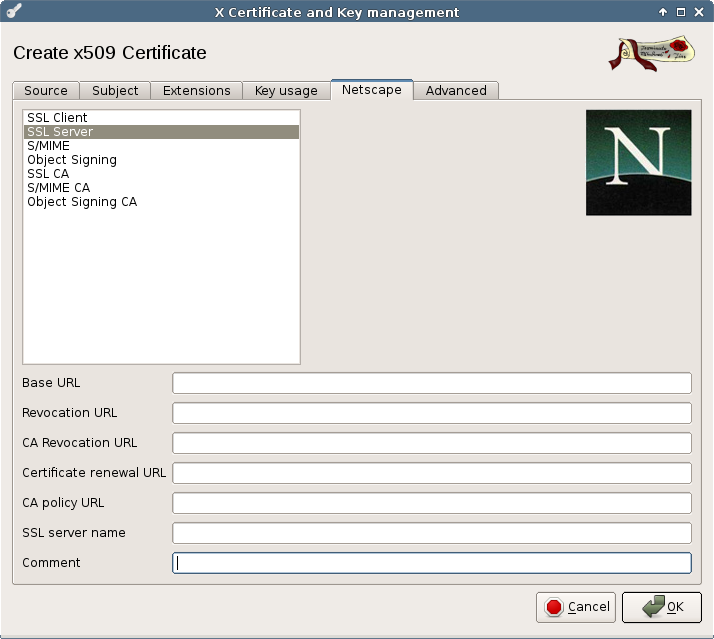
Mail certificate Netscape.
In the Netscape tab, the SSL server should already be selected. Press the Ok button to create the certificate.
The Netscape extensions are obsolete.
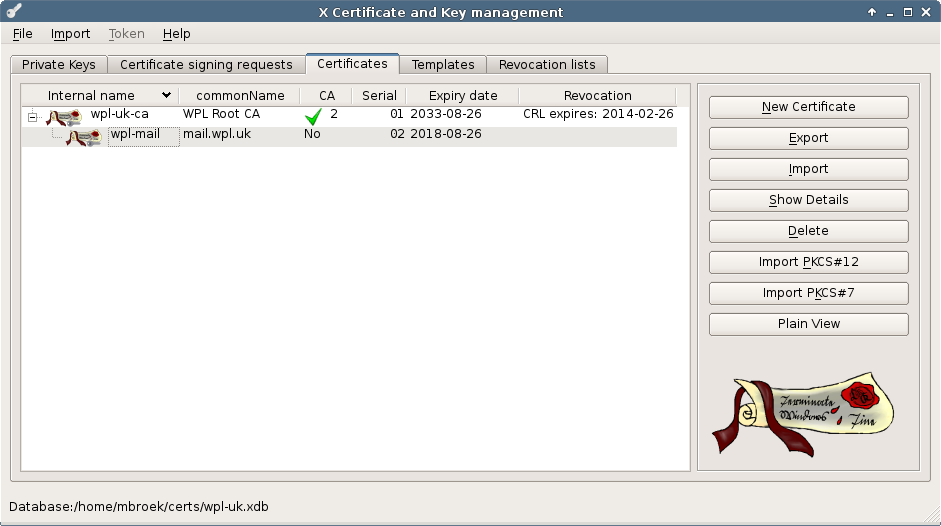
XCA main menu
We now have a Root CA and one server certificate. If you select a line and press the export button, the certificate will be exported to the home directory. For normal use export in PEM format.
Remarks.
If a certificate expires, you can replace it with a copy. Right click on a certificate, select Renewal and go ahead. But you can never do this with the Root CA, that would break the whole chain.
If some certificate gets lost (stolen client computer for example), do not delete the certificate or ignore it, but revoke it. Then generate a fresh CRL list. Make sure that clients that can use the CRL list (like OpenVPN can), use the new list so the thief cannot get onto your network. Also publish this list on the location that you have set in all the certificates.
There is no undo in this program, but you can delete mistakes. I prefer to make a copy of the database before I do anything and if something goes wrong, just start over using the copy and pretend you never made a mistake.
Download.
Nothing for this article.